.png)


Yamaha SY77
Refurbishment and Repair Project
About 18 months, maybe 2 years ago at the time of writing I acquired my Yamaha SY77. It really sounded peachy, but as with many of these Yamaha synthesisers produced at the time there was an issue with the Mitsumi floppy disk drive.
I made a list of some other issues that I thought this synthesiser had. Then I put the synthesiser in a box and took it to my storage unit. And that is where is stayed for that 18 months to 2 years mentioned above.
In the meantime I started to search varions websites for the parts that I had identified as needing to bring this synthesiser back to full operation. And then other priorities got in the way and this project took a back seat.
After finishing another project and having acquired all the parts that I thought I needed to undertake this SY77 project, I went and recovered the SY77 from storage and set about the process of brining it fully back to life.
In addition to the spare parts that I had acquired. I had also acquired several floppy disks with tones for the sound banks of the synthesiser, which due to the fact that the floppy disk drive had failed had not been tested.
The Yamaha SY77 was what I consider the natural successor to the Yamaha DX synthesiser line. The SY77 was released in 1989, this synthesiser and it's big brother the Yamaha SY99 released two years later provided the musician with the same FM synthesis from the DX-line and AWM synthesis created for the SY-line.
This series of videos were created to show how I set about repairing and refurbishing my Yamaha SY77.


The SY77 is not reporting that the current battery is running low. It would normally report this at the point of booting up following being switched on. But I have no idea when the current battery was installed and how much life it has remaining.
So I am going to use the opportunity while I have the SY77 open on the bench to fit a new battery. I am also going to use the opportunity to fit a battery holder to the mother board and removed the requirement to have to de-solder and re-solder the battery to the board in the future.
If you follow this video all the way through you will see that the process of changing the battery is not simple on Yamaha synthesisers and in particular this SY77. So the battery holder will pay dividends in the future next time I have to change the battery.
Click anywhere on the image or title to see the work undertaken on this synthesiser.

The SY77 restoration project has been a relatively quick project.
Previous videos have:
shown how to access the internals of the SY77
how to change the battery and modify the battery to a battery holder arrangement
how to change the floppy disk drive with something a little more modern
In part 5 of the this video set we get to find out whether the restoration to the SY77 has been successful.
Click anywhere on the image or title to see the work undertaken on this synthesiser.
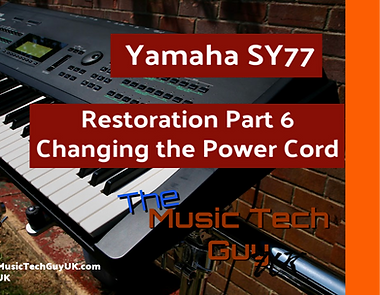
Why is Jon cutting the plug off this working Yamaha SY77 Synthesiser.
Most Yamaha equipment of this time was sold with a moulded plug suitable for the region of the world that that synthesiser was sold into. Some would argue this was for safety. And maybe it was. But I would also say it made it harder to transport between regions and voltage zones.
Anyway, when you put your nice and well cared for Yamaha SY77 in a case you run the risk of the prongs from the plug moving and digging into the keyboard, synthesiser case or worse damaging the display.
For these reasons I like to remove the moulded plug and replace it with an IEC connector which doesn't damage the synthesiser in transit. There is also the added advantage in the studio that with a standard 3 amp (or less) IEC cable on each keyboard stand, swapping keyboards is just a case of connecting the existing mains connection. (Subject to the voltage caveat of course.)
This is how I changed the cable in my Yamaha SY77.

The SY77 was refusing to load any patched or programs from any of the disks that I have for the SY77. Leading to the conclusion that the floppy disk drive was 'banjaxed'.
This was not a surprise as the floppy disk drive on the Yamaha synthesisers of the time: SY77, SY85 and SY99 is considered the achilles heal of the instrument. Most of these drives were made by a company called Mitsumi Electronics and incorporated a rubber belt driven drive system.
These rubber belts stretch and don't drive the spindle correctly or just perish and disintegrate. Requiring them to be replaced on a regular basis or in this case I am installing a newer direct drive floppy disk drive that will totally eliminate the belt problem.
In this video I install a new direct drive floppy disk drive into the SY77.
Click anywhere on the image or title to see the work undertaken on this synthesiser.